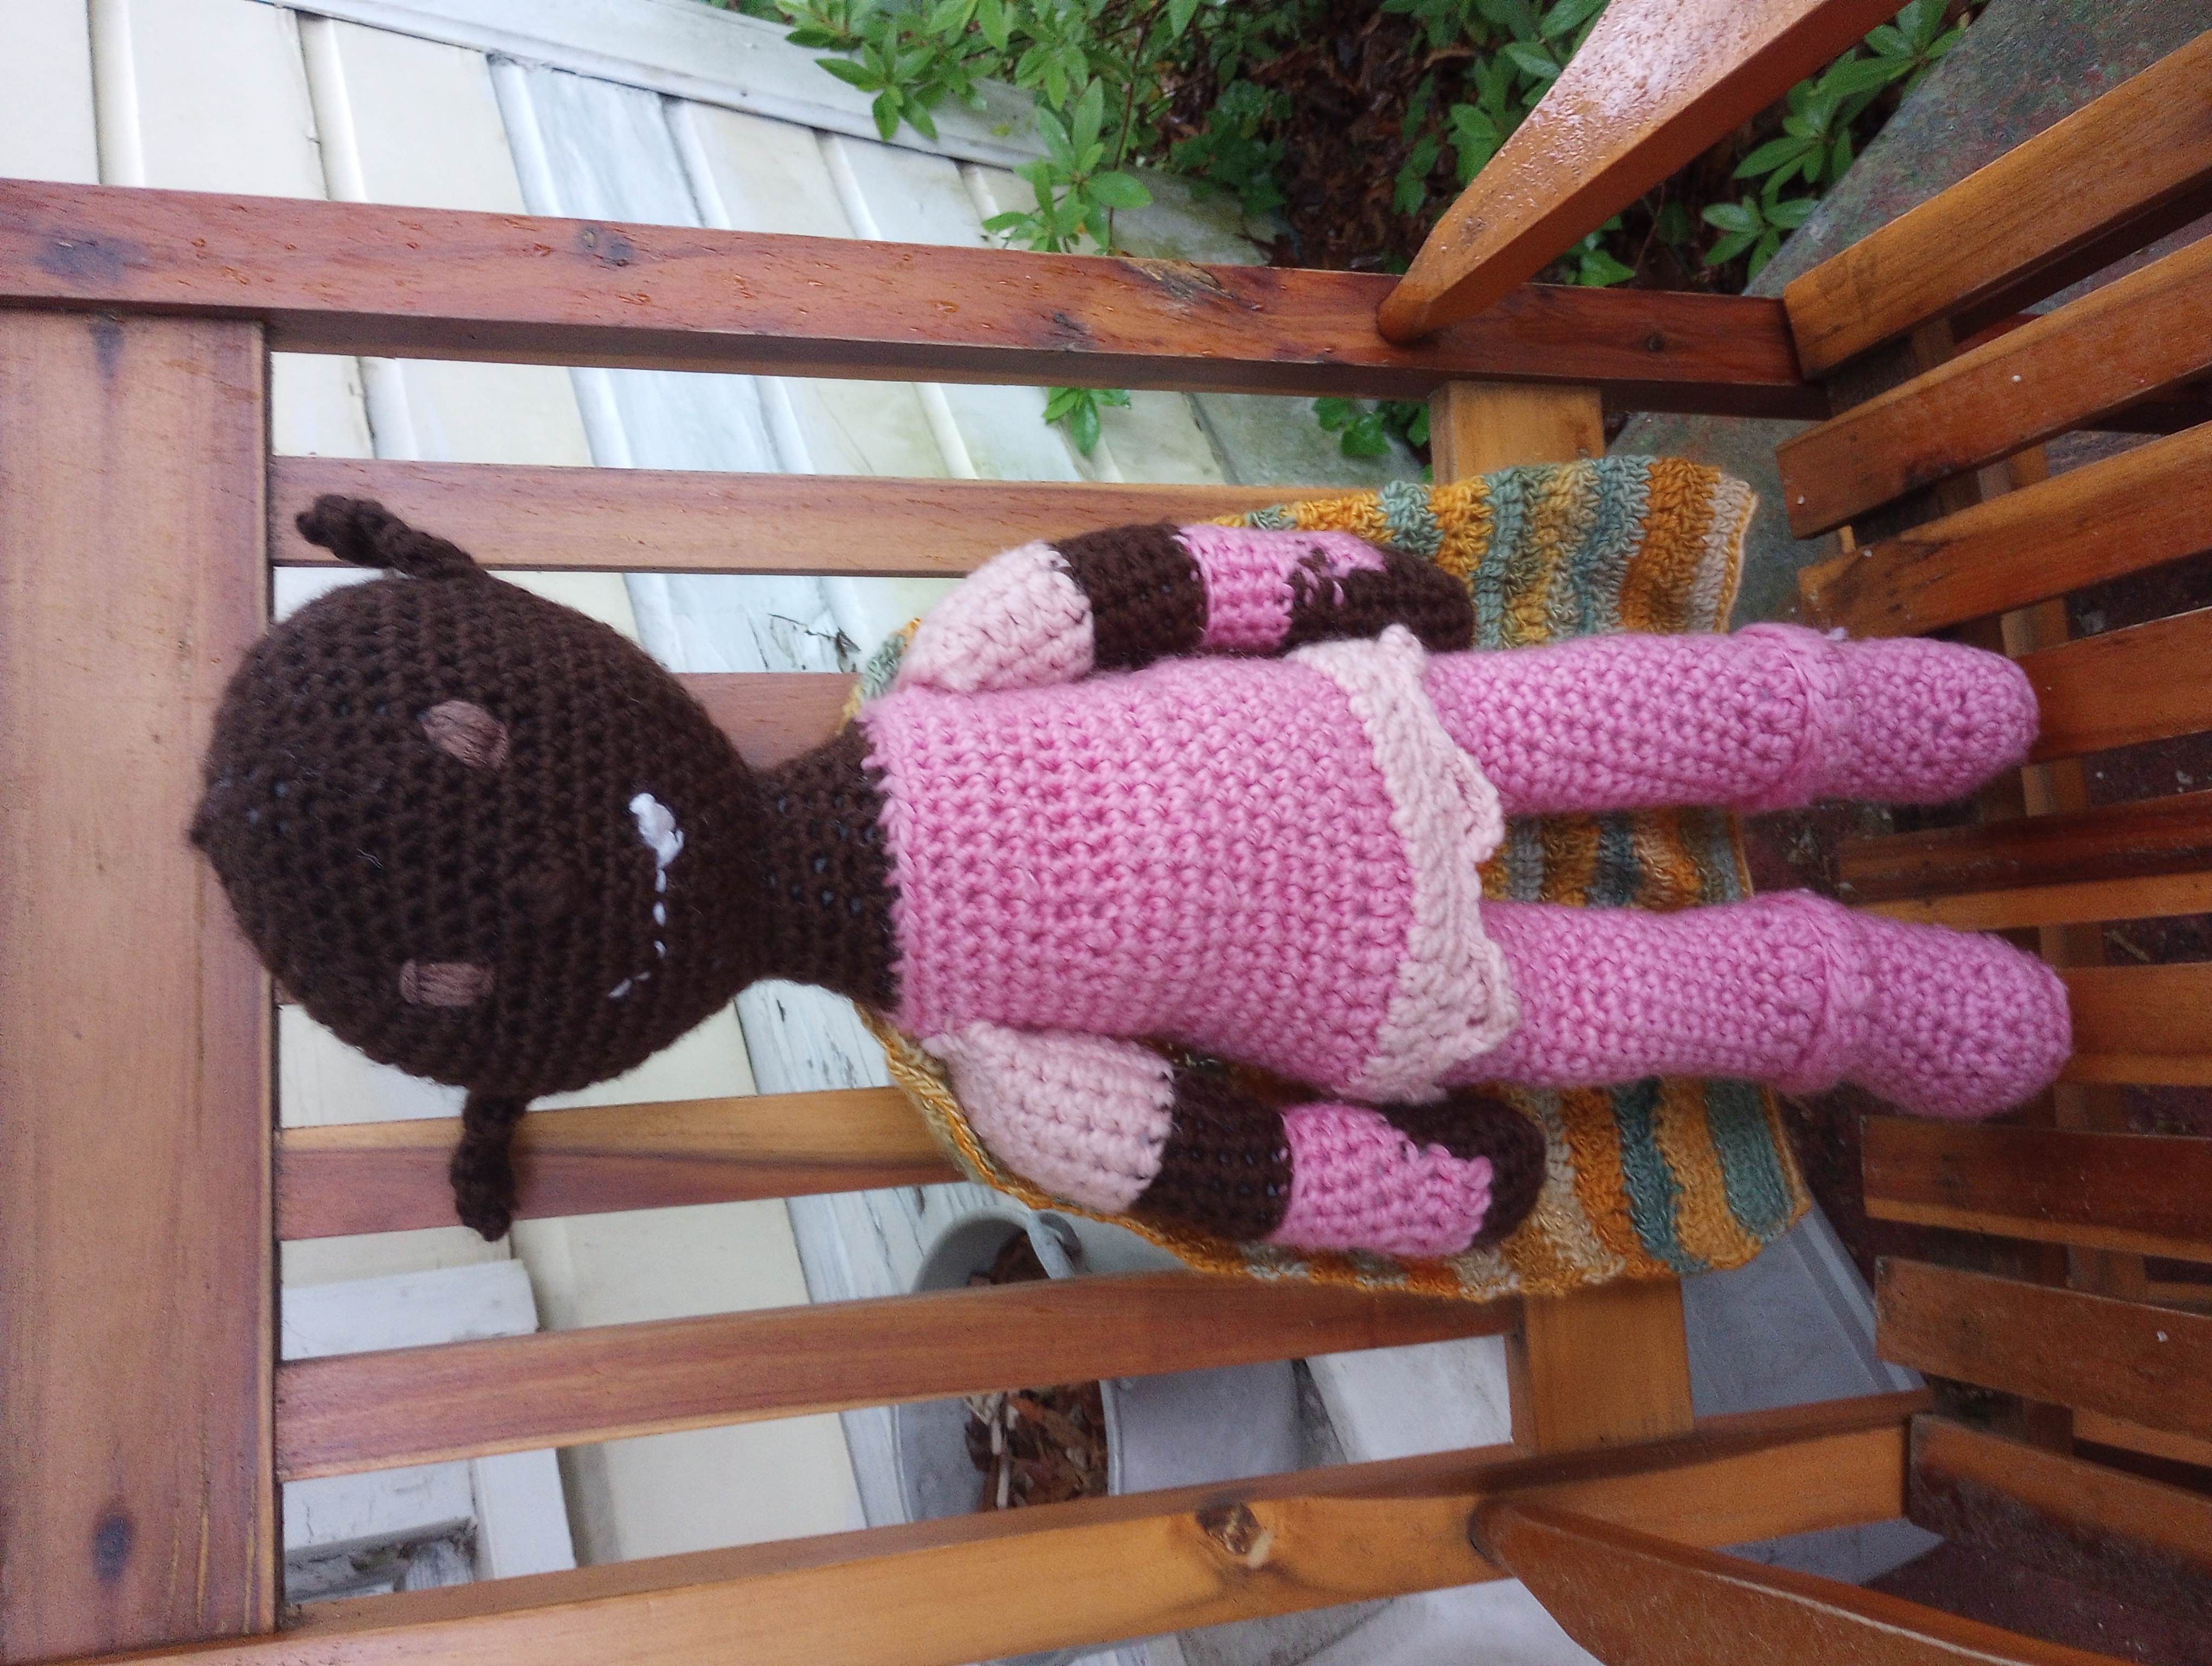
Character Name: Azu
Fandom: Rusty Quill Gaming [Podcast]
Played By: Helen Gould
Yarn Used:
Skin: Loops & Threads Cozy Wool - Chocolate
Shoes/Trousers/Armor: Loops & Threads Cozy Wool - Petal Pink
Armor Contrast: Lion Brand Wool-Ease Thick & Quick - Rouge
Eyes - CraftSmart Value - Coffee
Mouth - CraftSmart Value - White
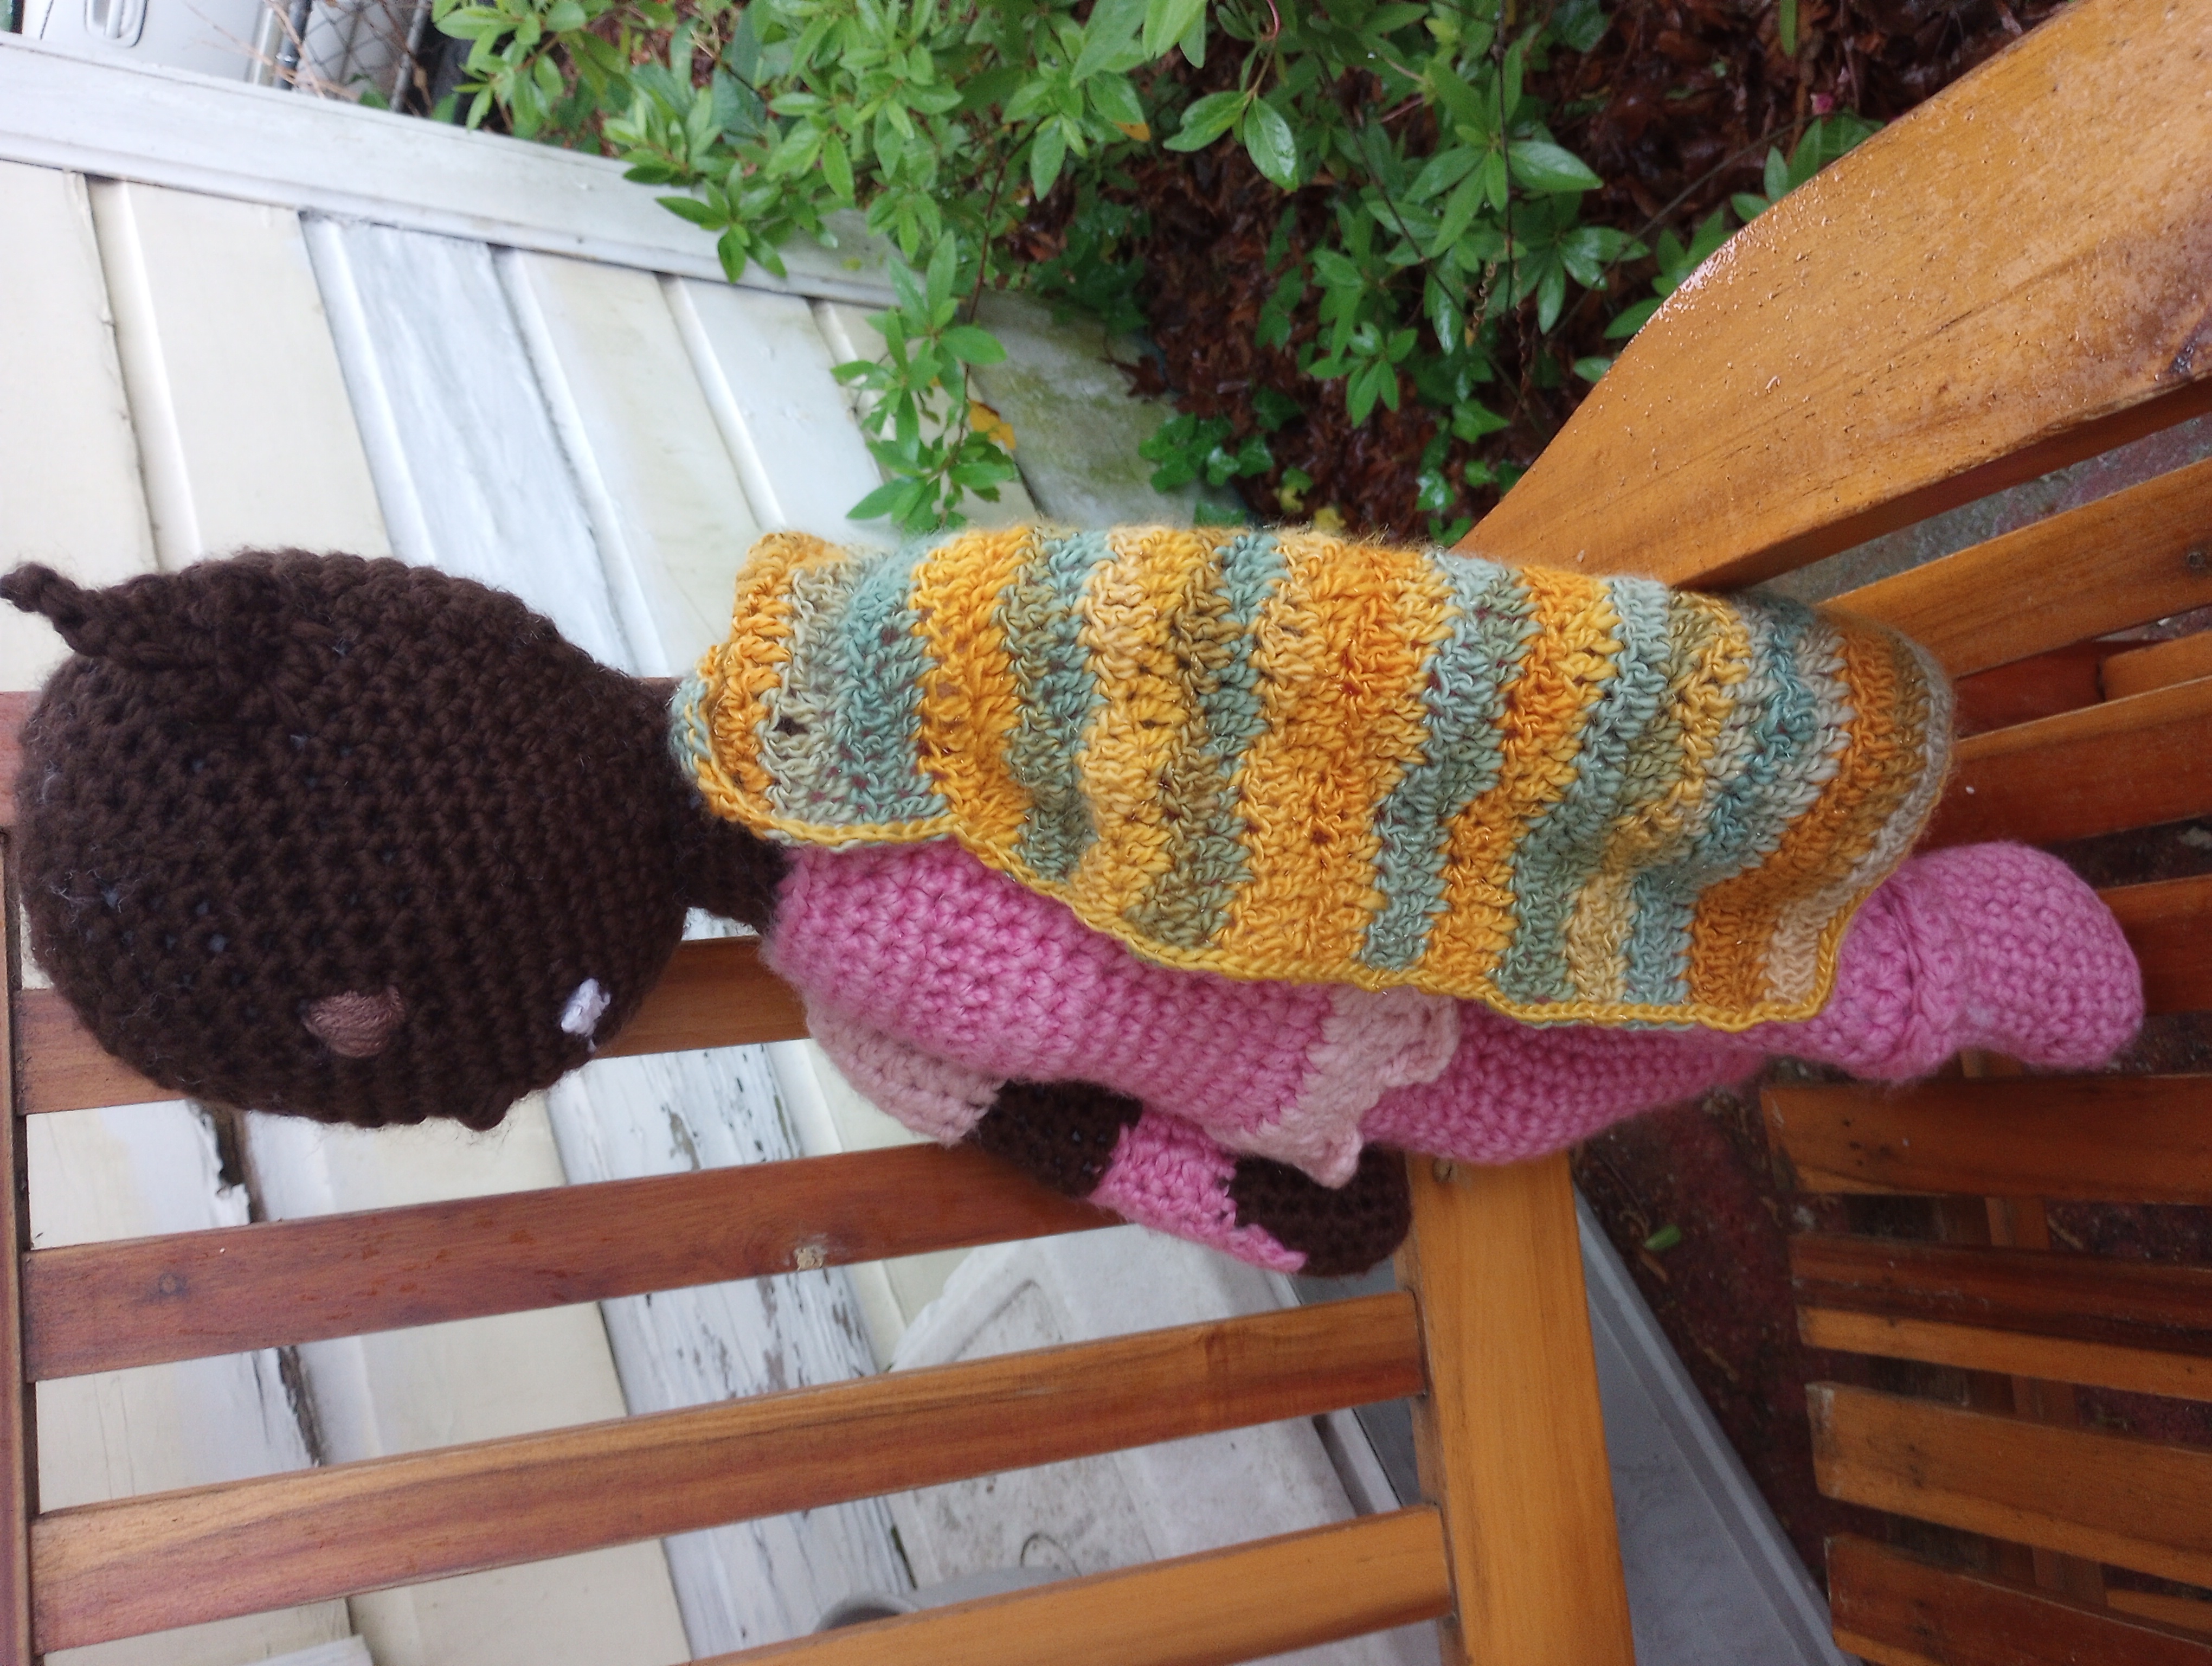
Cloak - Loops & Threads Facets - Coastal
Basic pattern here.
Canonically, I know Azu isn’t actually that much bigger than a human - her height is given as 6’6” in the finale before she activates her armor and doubles in height - but she’s got a big personality, so I wanted her to be bigger. Hence why I used a much thicker yarn for her. That being said, I actually went down a couple hook sizes from what the label said to use (it claims I should be using a 10mm/US 15 hook, but I did the foundation chain with a 9mm hook and then started crocheting with an 8mm, and it worked a lot better). Other ways Azu alters from the base pattern are as follows:
Shoes: The most fashionable of pink boots! Like most of the other blorbos, I made Azu’s shoes all one color, but in my defense, this yarn was only available in one shade of pink. To give her boots, I worked the pattern as normal up until row 11, then:
R12: Ch 2, hdc in back loops of each sc around, sl st in first hdc (15 hdc).
R13: Ch 1, dc in front loops of R11 around, sl st in first dc (15 dc).
R14: Ch 1, hdc in each hdc from R12 around, sl st in first hdc (15 hdc).
Trousers: I didn’t really do anything special with Azu’s pants/leggings/whatever the heck she wears between her boots and her agile half-plate, but I did stop a row earlier than in the basic pattern because reasons, so the body starts at R29 instead of R28. Basically, take away R29 and the pattern is the same as the base from R15-34.
Armor: I wanted to give Azu a little bit of a waist, and also put a kind of decoration at the bottom of the armor (not exactly a skirt or kilt, but something like that), but also kind of emphasize that she had broad shoulders. I probably made this a bit more complicated than I needed to, but:
R35: Ch 1, sc in front loops of each sc around, sl st in first sc. Without doing a chain st for height, sc in back loops of each sc in R34 around, sl st in first sc in back row (38 sc).
R36: Ch 2, hdc in back loop of front sc and front loop of back sc around, sl st in first hdc (38hdc).
R37-40: Continue as in base pattern.
R41: Ch 1, inv dec five times, sc in next 8 st, inv dec 6 times, sc in next 8 st, sl st in first st (27 sc).
R42: Ch 1, [sc in first 2 st, 2sc in next st] 9 times around, sl st in first sc (36 sc).
R43-50: Ch 1, sc in each st around, sl st in first sc (36 sc).
R51: Switch to skin color. Ch 1, [sc in first 2 st, inv dec] 9 times around, sl st in first sc (27 sc).
Continue remainder of pattern as in base pattern.
After completing her body (actually after completing literally everything else), I added on the decoration by joining the armor contrast color (Wool-Ease Thick & Quick - Rouge) to the loops standing out from R35, and then:
R1: Ch 3, dc in front loop of each st around, sl st in first dc (38 dc).
R2: Ch 1, [sc in next st, ch 3, skip next st, tc in next st, ch 3, skip next st, sc in next st] around, sl st into first sc.
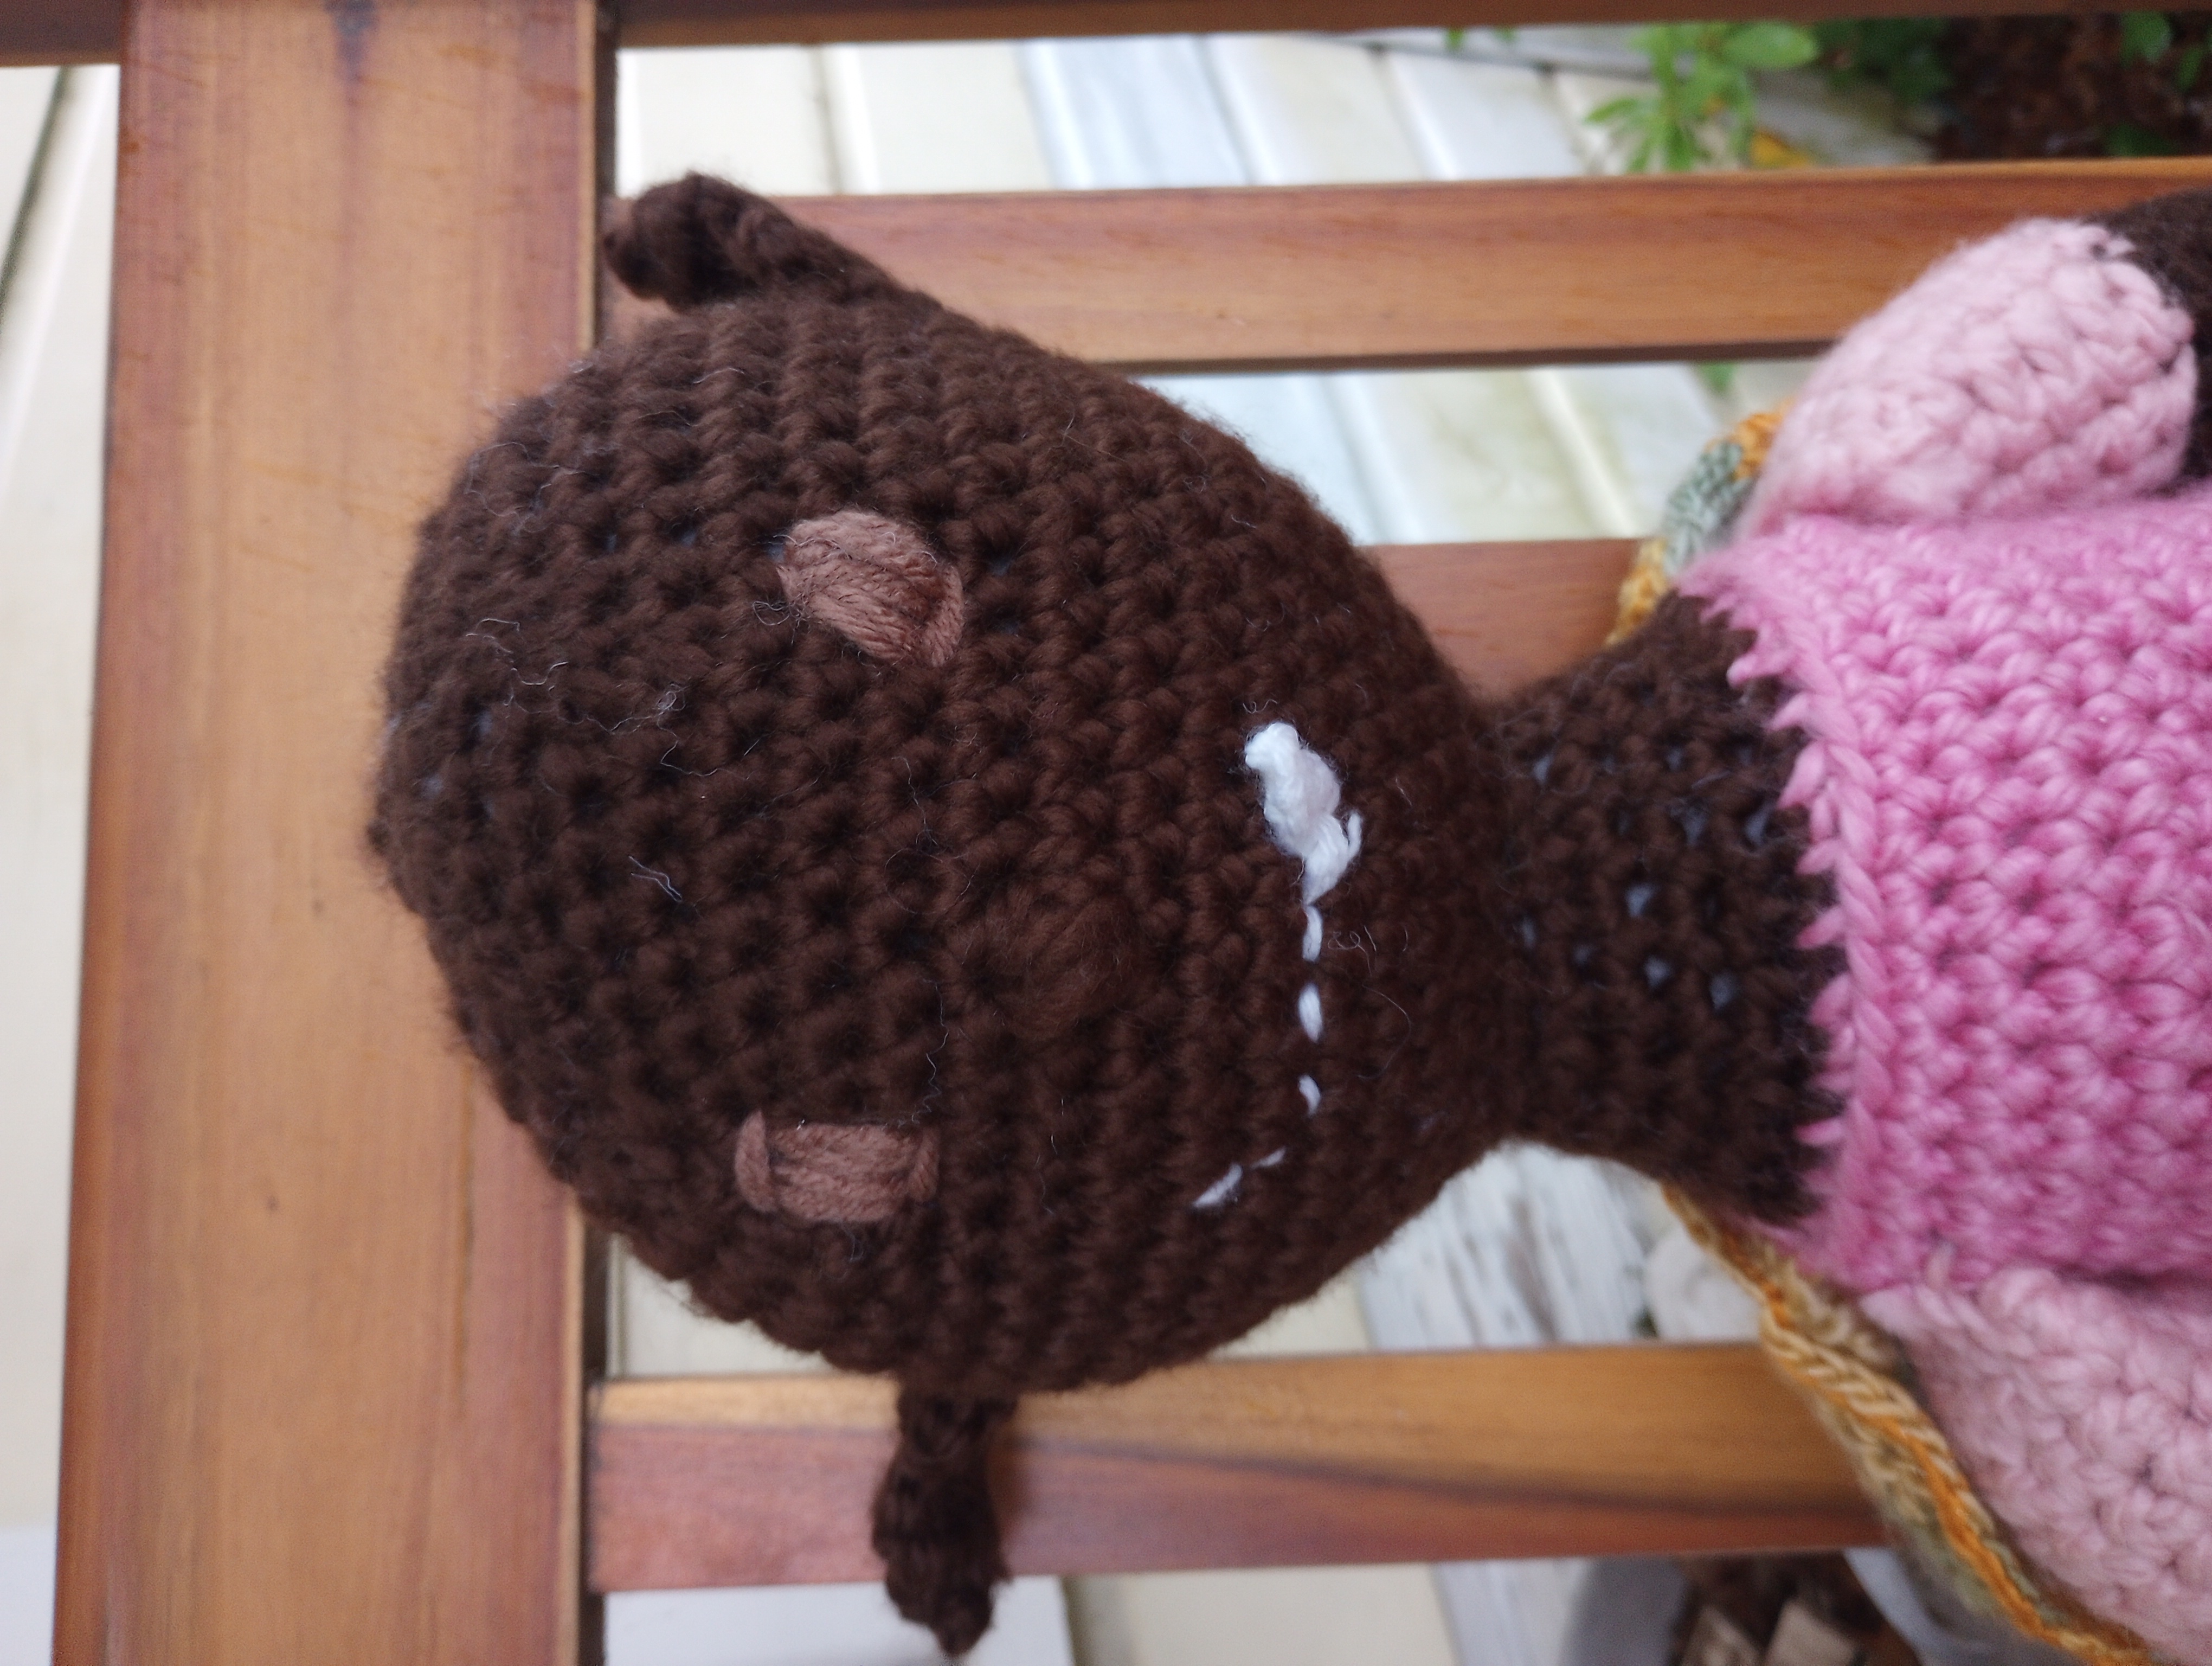
Head: I embroidered Azu’s eyes with some of the regular yarn, partly because I didn’t have safety eyes big enough and partly because I forgot to put them on before I finished. For her mouth, I crocheted the single fang (she broke the other one in the battle with the Lads and Blokes) by ch 3, turn, sc in second ch from hook, sc in next st, ch 1, turn, inv dec, and then sewed it in place and embroidered the rest of the mouth. The ears were made as follows:
R1: Leaving long tail, ch 7, turn, sc in second ch from hook, sc in each ch, turn (6 sc).
R2: Ch 1, sc2tog, sc in next 2 st, sc2tog, turn (4 sc).
R3: Ch 1, sc, sc2tog, sc, turn (3 sc).
R4: Ch 1, sc in each st across, turn (3 sc).
R5: Ch 1, sc2tog, insert hook into same sc, sc2tog, turn (2 sc).
R6: Ch 1, sc2tog, turn (1 sc).
R7: Ch 1, sc, bind off (1 sc).
Stitch ears to either side of head using long tail. (I ended up getting them uneven, but I think it works for her.)
Arms: Pro tip for any yarncrafters starting or plotting a project: If the yarn you’re buying is on clearance, buy all of the yarn that is available. I realized when I got to her arms that I only had a little bit of the pink yarn left over, not enough for full sleeves, and I thought I had another ball but I didn’t…and Loops & Threads Cozy Wool was discontinued before I ever started Azu, let alone before I finished her. Thank God for yarnconverter.com, which helpfully provided me with the knowledge that Wool-Ease Thick & Quick had the exact same gauge. I used the Cozy Wool for Azu’s gauntlets. Pattern worked as normal up through R7, and then:
R8: Ch 1, sc in first 9 st. Join armor yarn, fpdc around next 6 st in R6, join with sl st (9 sc, 6 fpdc).
R9: Ch 1 using skin yarn, (sc in next 2 st, inv dec) 3 times, switch to armor yarn, (sc in next 2 st, inv dec) 2 times, join with sl st (12 sc).
R10: Ch 1, sc in back loops of first 6 st, sc in next 6 st, join with sl st (12sc).
R11-13: Continue as normal.
R14: Switch to skin yarn. Ch 1, sc in front loops of each st around, join with sl st (12 sc).
R15-18: Continue as normal.
R19: Switch to armor contrast color. Ch 1, sc in back loop of each st around, join with sl st (12 sc).
R20-25: Continue as normal.
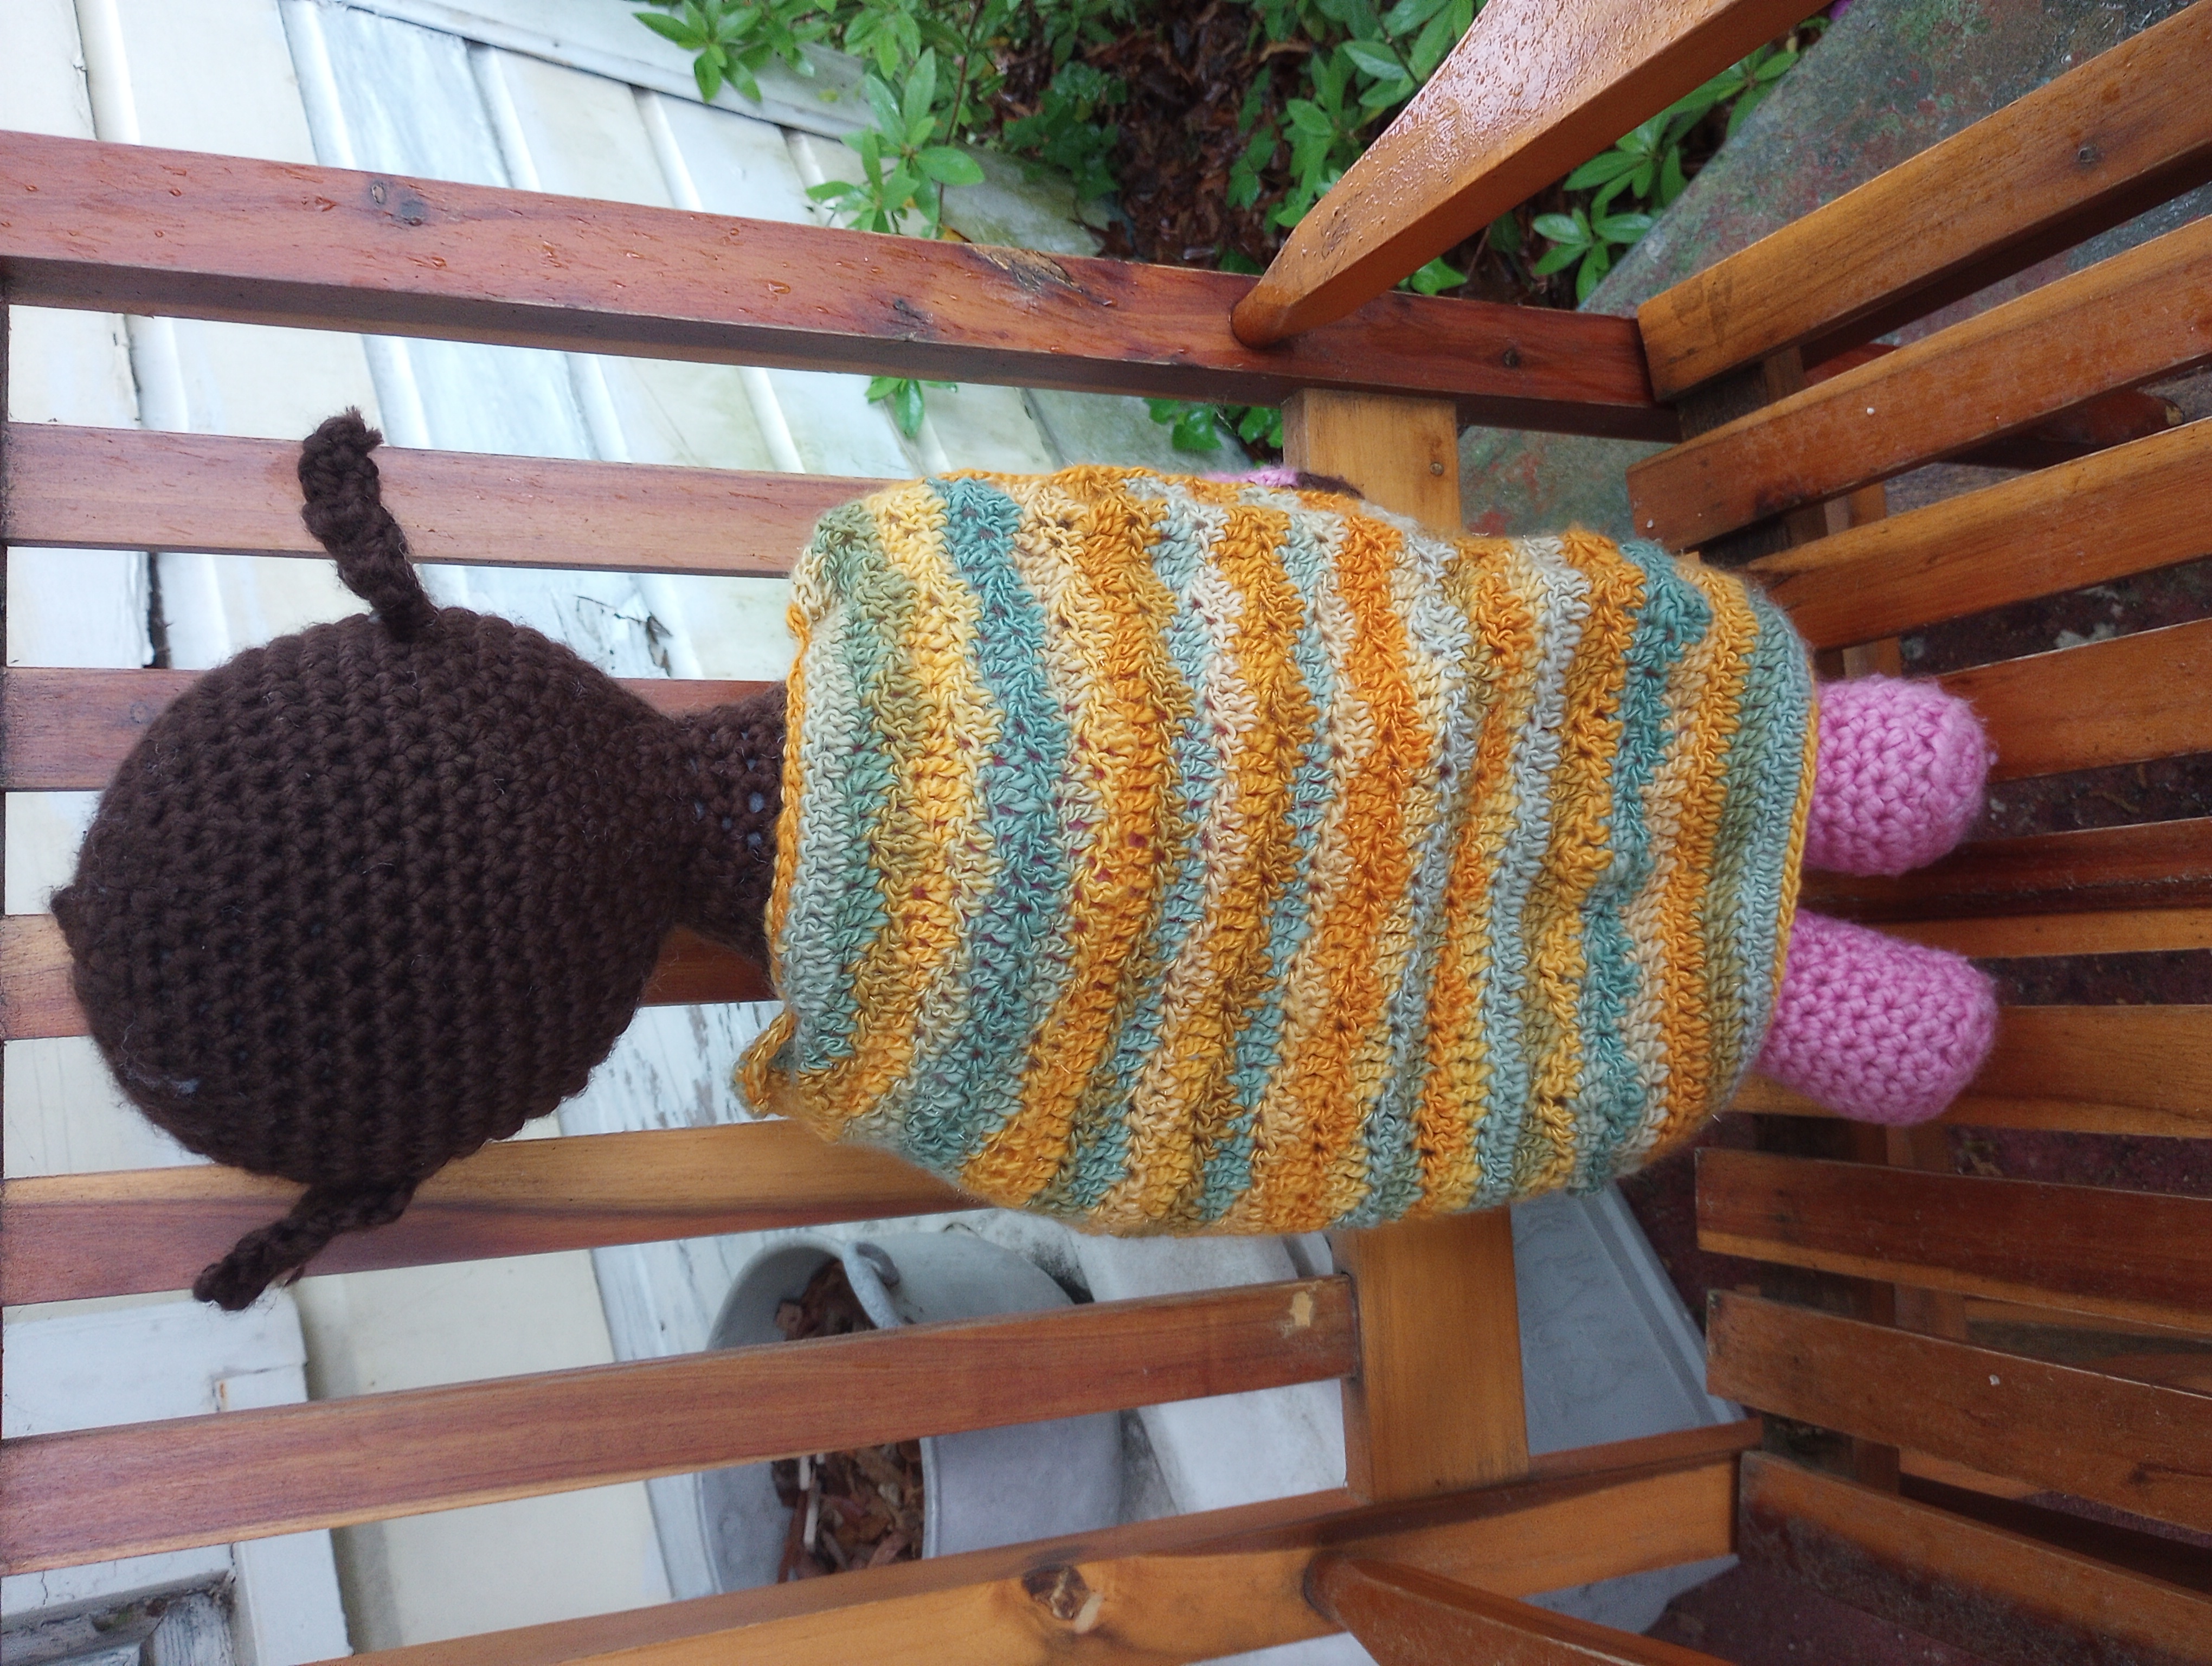
Cloak: The official art on the shirts has Azu with a cloak, so I made her one. (Admittedly, I also did it because I saw the yarn at Michael’s, thought it was pretty, and wanted an excuse to make it.) I really didn’t do anything particularly exciting with it, just made more or less a square with a fairly basic wave stitch pattern. When I decided it was long enough, I finished off with a row of sc and stitched three of them on either side directly to her shoulders so the cloak is part of her half-plate. I also edged the entire thing in a slip stitch, less for aesthetic reasons and more because I hadn’t realized how close I was to being done with it when I got to church and needed something to keep my hands occupied during the sermon. I do think it looks nice, though, and I’m going to have to start doing it more often…